Introduction Link to heading
In the last post I talked about a homelab and what it is. If that tickled your fancy and you want to get started, but you don’t have much developer or even Linux experience, this is the post for you! We will talk about how to set up your very own homelab to get you started with basically zero costs, given you have some basic things lying around. What you will need is:
- An old computer (could be a PC or laptop, or anything really) that you don’t use anymore (this will be your server)
- A USB stick (4GB or larger)
You also need a PC that you use, since we will access our homelab computer from a web Graphical User Interface (GUI).
Getting started Link to heading
I’m going to assume you are using Windows for your operating system since that makes this walkthrough quite a bit easier. I personally don’t have experience with macOS and if you’re already on Linux, you presumably don’t need this walkthrough 😄.
If the computer you are using is too old, you might run into problems later down the line. I have not experienced this myself, but I assume not everyone following this walkthrough will get through it without any problems. If you encounter any problems that you just can’t find a way to get around, feel free to reach out. Make sure your server is connected to your network through a cable, otherwise you won’t be able to reach it later.
Actually getting started Link to heading
We are going to use CasaOS, a GUI for the Docker ecosystem, to set up a few essential services for your first homelab. This is perfect for people just dipping their toes into homelabs since after some initial steps, we will be able to use CasaOS to set up services in an easy and visual way instead of command line code. First, start up your Windows computer and insert your USB drive. We are going to install a tool called Rufus on this USB drive to be able to install a Linux operating system on your server. So go ahead and open a web browser and navigate to the Rufus homepage and click on the Standard Windows x64 download. Save the .exe file to wherever you like where you can find it again. Open the file from your file explorer and Rufus should open up, no installation is necessary.
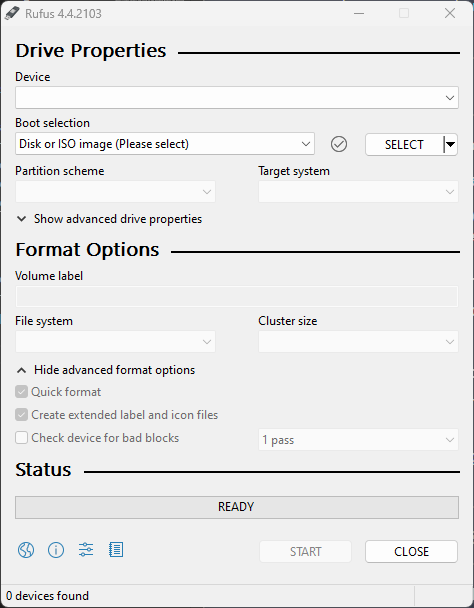
Now all we need is an operating system to put on the USB drive. I’ve chosen Ubuntu Server since it is what I’m familiar with, but you can choose any of the available Linux distributions. The Server part of Ubuntu Server just means that it won’t have a GUI. Which is perfect for our use case since we will be using CasaOS for that. Download a Ubuntu Server LTS version of your choice. In Rufus select your USB stick under ‘Device’. Then from the SELECT button find your Ubuntu ISO file. Leave everything else to default and click start. You may be alerted that Rufus requires additional files to complete writing the ISO. If this dialog box appears, select Yes to continue. You will then be alerted that Rufus has detected that the Ubuntu ISO is an ISOHybrid image. This means the same image file can be used as the source for both a DVD and a USB stick without requiring conversion. Keep Write in ISO Image mode selected and click on OK to continue. Rufus will also warn you that all data on your selected USB device is about to be destroyed. This is a good moment to double-check that you’ve selected the correct device before clicking OK when you’re confident you have. Wait until the Status bar at the bottom is fully green and says ‘READY’ and click ‘CLOSE’. We now have a USB stick that can install the Ubuntu Server operating system!
Installing Ubuntu Link to heading
Now it’s time to insert the stick into your server and reboot the device. It should recognize the installation media automatically during startup but you may need to hold down a specific key (usually F12, but the screen should show which one exactly) to bring up the boot menu and choose to boot from USB. It will usually look something like this.
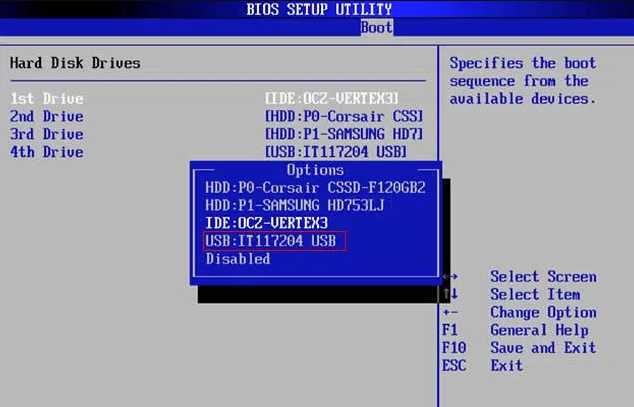
Select your USB stick as the first option and find ‘Save and exit’, which should restart your server. After some scrolling text, an image similar to this should appear.
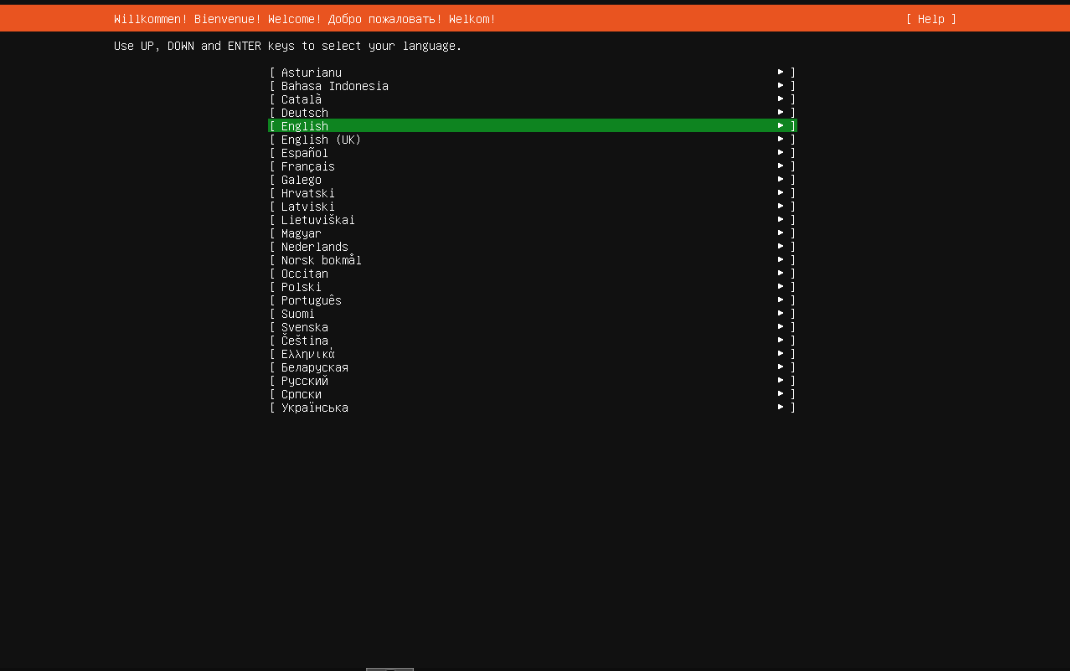
Select your preferred language and press Enter.
You can probably leave the keyboard configuration screen that is up next to the selected values.
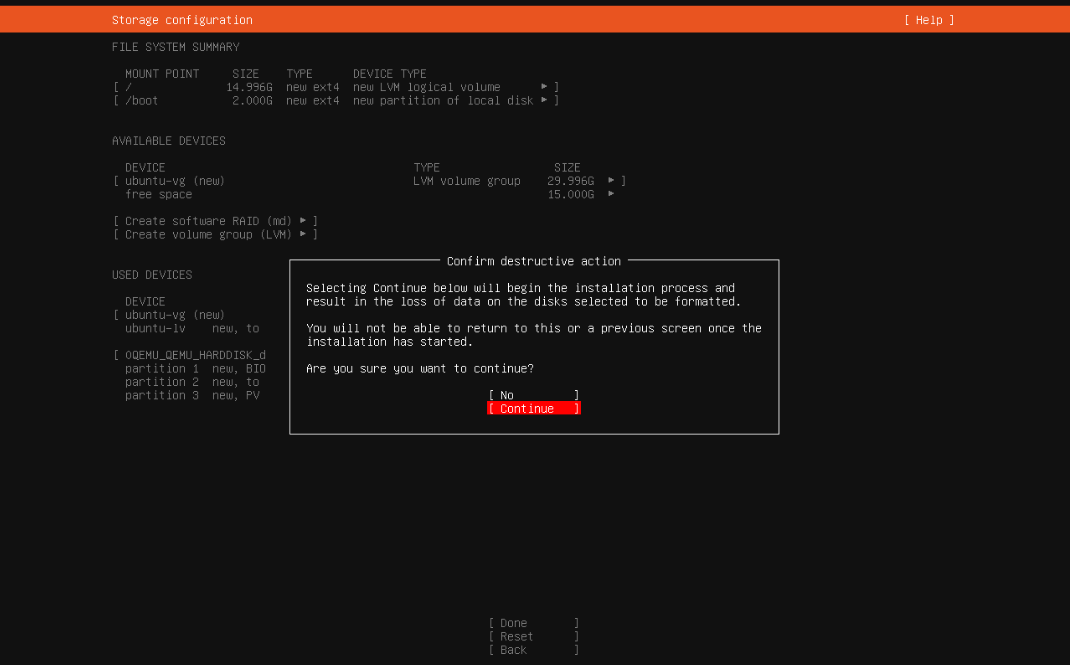
The same goes for the next few screens where you select your install (select Ubuntu Server), networking (leave default), proxy address (leave blank), mirror selection (wait for it to finish and select ‘done’), storage, and filesystem setup (leave default). At the end, you get an extra warning that you are about to delete all data on the disk that you will be using. So back out now if you have data on there that you want to keep.
You then need to input your name, the server’s name, a username, and a password.
Skip getting Ubuntu Pro for now.
Select ‘Install OpenSSH server’ with the spacebar and select ‘Done’.
Don’t select any featured server snap, we don’t need any for now.
Your installation of Ubuntu should start now. Once finished you should get a similar screen to this, where you should select ‘Reboot Now’. Don’t forget to remove the USB stick so your installation doesn’t start again.
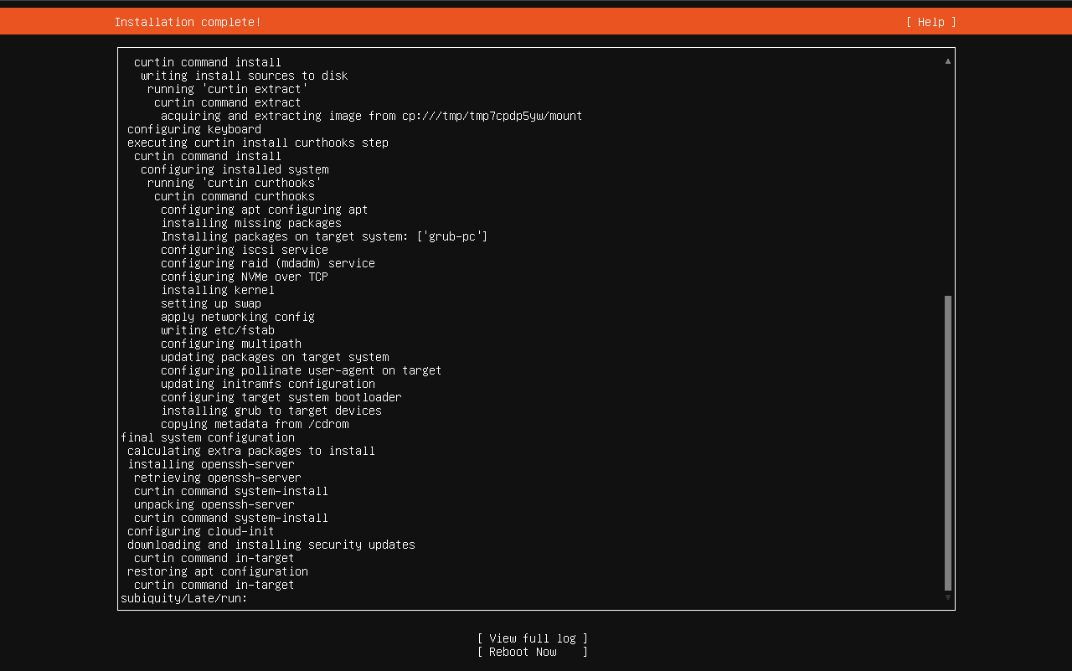
Some of these steps might be different for you, depending on the version of Ubuntu you are installing. Don’t be afraid and just read the prompts and decide what to select. If you don’t know what something is yet, it is probably best to leave it the default.
Installing CasaOS Link to heading
Now the hard part is done and the fun part can begin! CasaOS is the graphical UI that makes installing Docker images a breeze. With Docker images, you can install applications consistently no matter what OS or environment you are using. To install CasaOS, simply type the following line and press enter. You will most likely be asked to input your password again.
curl -fsSL https://get.casaos.io | sudo bash
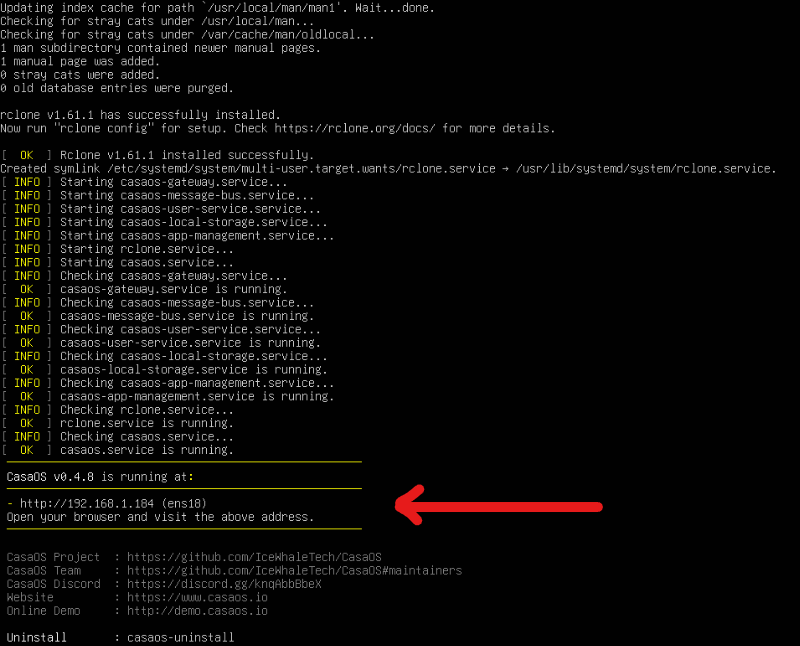
To explain briefly what is happening here, curl is a program to send data to and from a server. Just like if you type in https://www.google.com, you are requesting your browser to get the data that is returned from that URL. You can verify this yourself by typing in https://get.casaos.io in a browser. That script will be returned by the curl command. We then see a ‘|’ (called a pipe) symbol, which means using the output on the left as input for the command on the right. Sudo just means that you want to run this command with the privileges of a superuser. And finally, bash just means running the script. When finished it should look something like this. Now it is time to switch to your Windows computer and follow the suggestion that the red arrow is pointed at: input the IP address on a browser.
Using CasaOS Link to heading
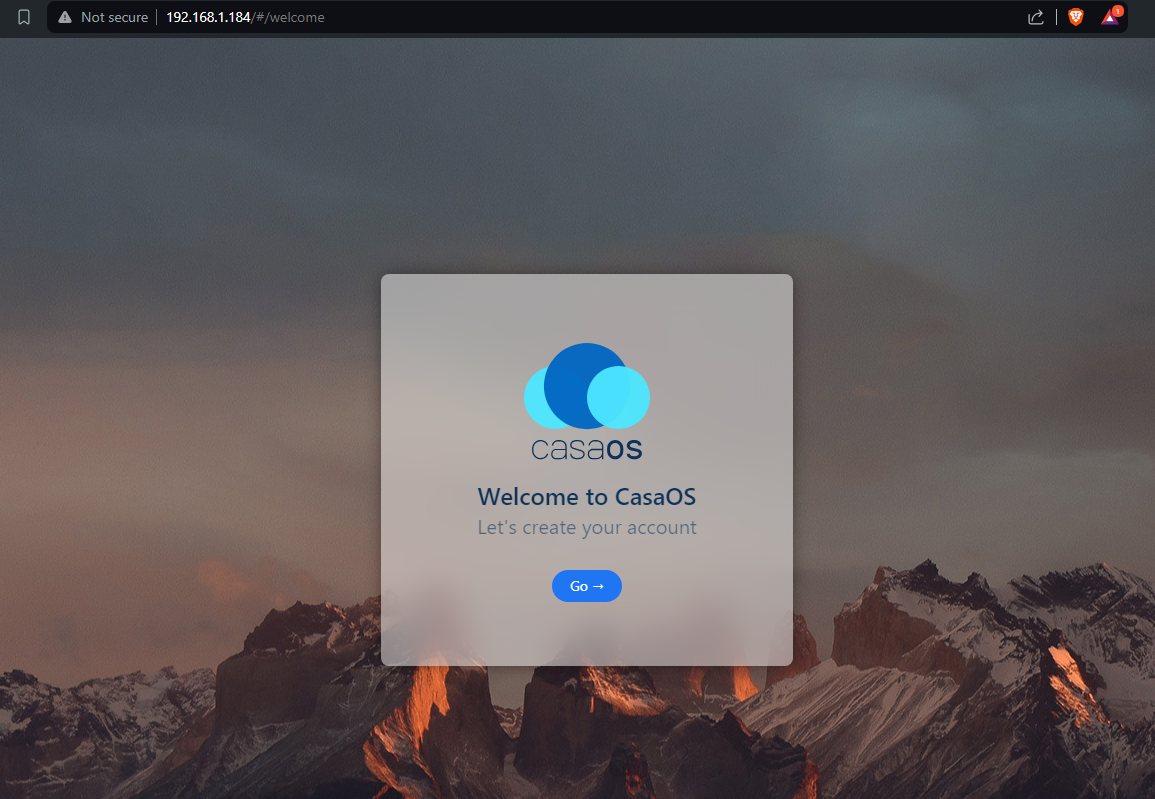
When your browser is done loading you should be greeted with this screen. Create your account with a username and password and get into the UI.
To finish off this walkthrough let’s install a simple container. I’ve selected MySpeed, to find it go to the app store and select MySpeed. After installation, you should be back at the home screen where a new MySpeed icon is created. Simply click it and you will see the MySpeed homepage. For fun select the little speedometer in the top right corner and test your internet speed from your server.
Your turn Link to heading
I hope I’ve been able to show you how relatively easily you can set up a homelab without much networking or computer knowledge. Maybe all of this has been totally new for you in which case all steps might have felt very foreign. Don’t underestimate how many new things we have touched like different operating systems and how to install them, Docker, and bash. However, this experience will translate to a lot of other things that you can do now.
Now it’s your turn to play around. Install some other apps like PiHole or AdGuard and PhotoPrism. Or set up a home media server with Jellyfin. Once you’ve installed the whole app store and are using some services you are ready for the next steps. Because there is a lot more to do and learn!