Introduction Link to heading
Keyboards have been around forever, and we use them every day for up to 12 hours a day. We type millions of words per year without even thinking about the how and why of the keyboard. Maybe the keyboard you use is your standard laptop keyboard, a separate keyboard, or even a mechanical keyboard with fancy switches and lights. Today you will learn why they are all bad.
A normal keyboard? Link to heading
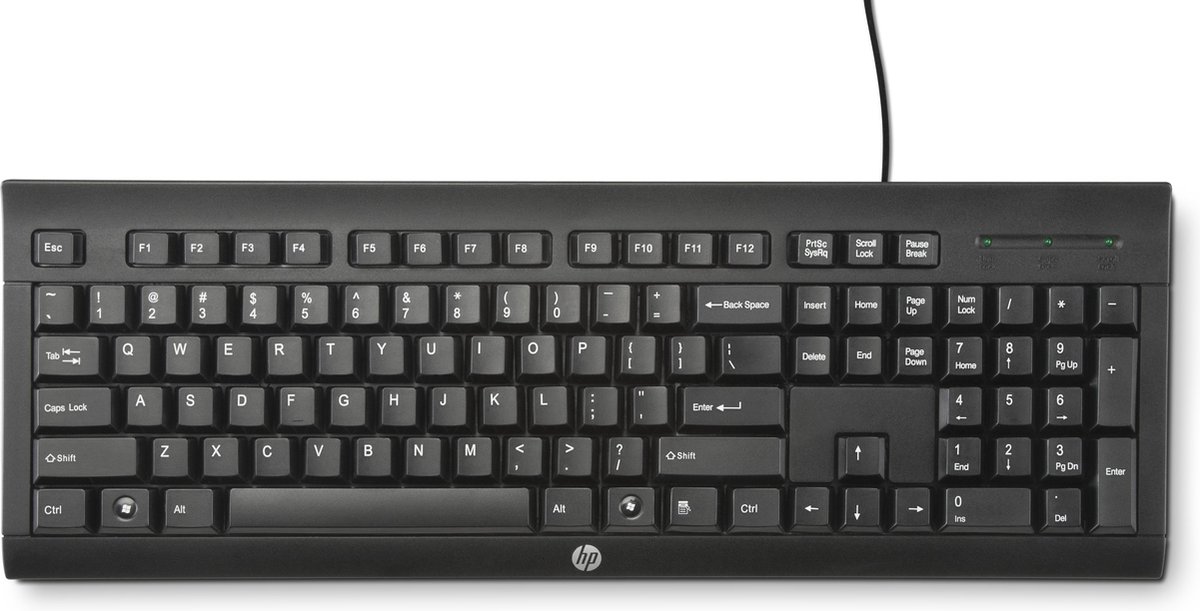
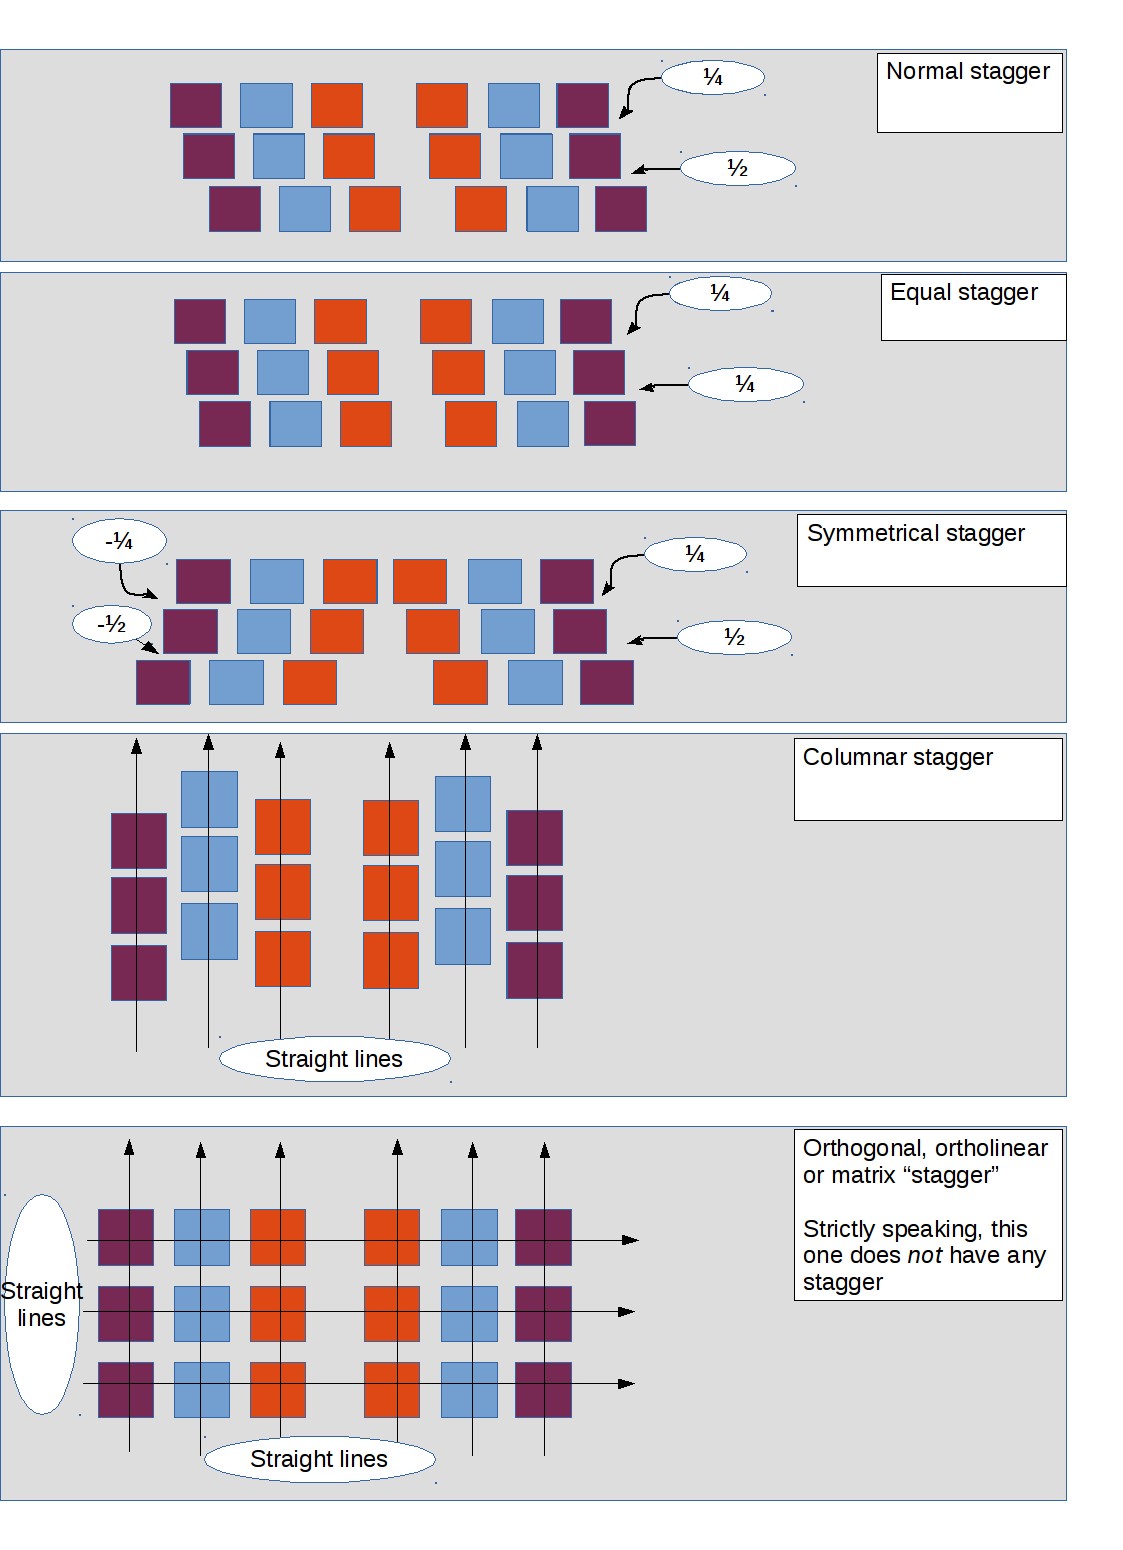
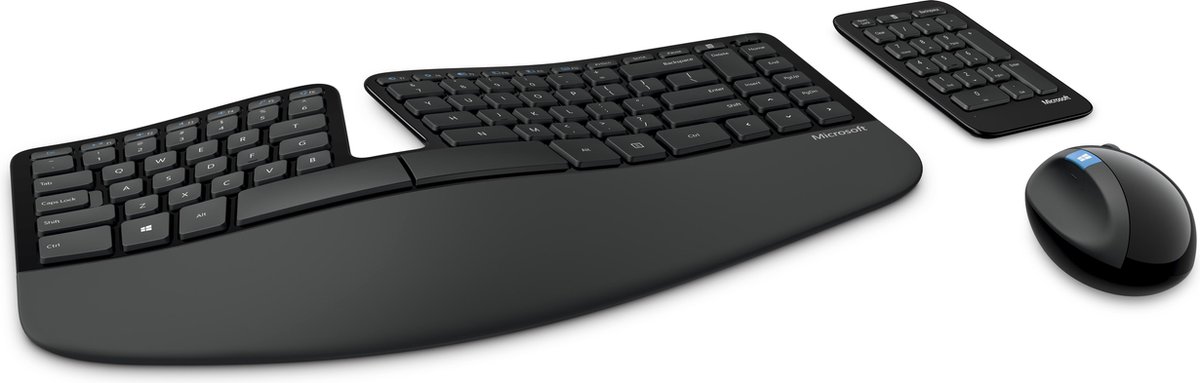
Your keyboard probably looks very similar to the picture below; it has more than one hundred keys, some of which you never even touched. It has a qwerty layout, which means that at the start of the top row, it spells out ‘qwerty’. It has a huge spacebar you use with the same finger every time anyway. There are three rows of letters, which are staggered vertically, meaning the second row is a quarter of a key to the right of the first row and the third row is an extra half of a key to the right of the second row.
A bit of history Link to heading
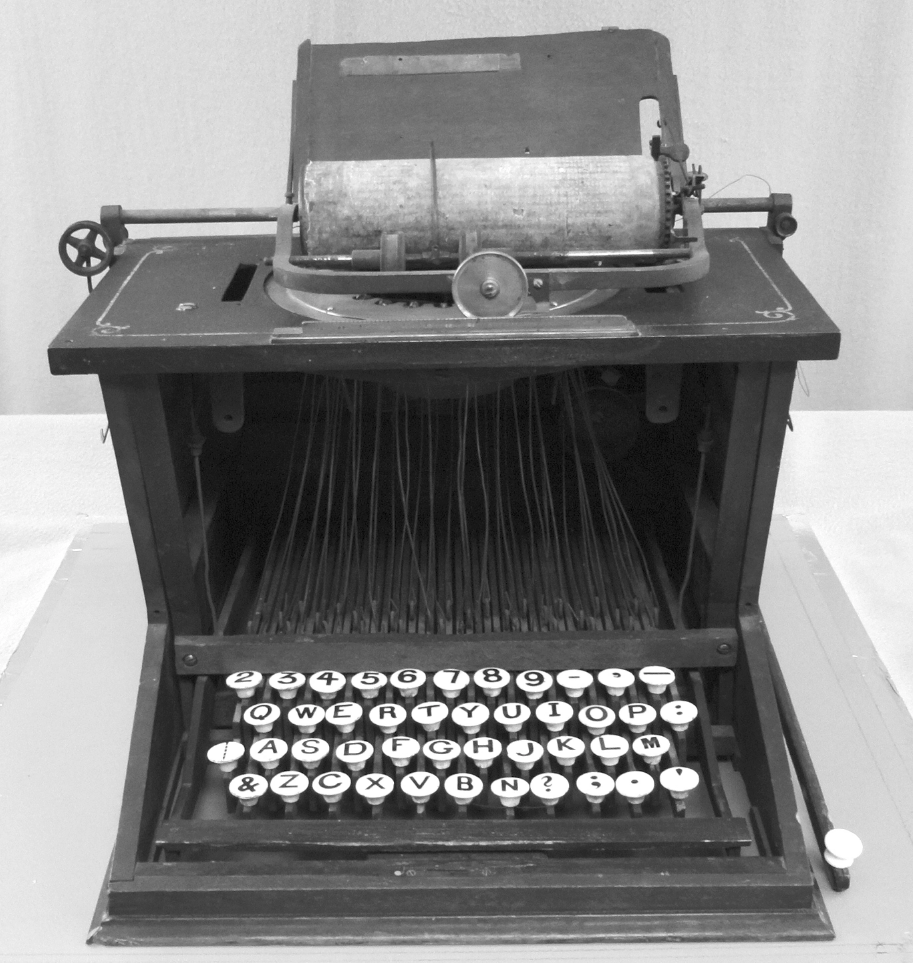
Standard keyboards are an adaptation of a typewriter, which people used to use before computers were a thing. You would put a piece of paper in your machine and when you pressed a key, a lever would stamp a bit of ink on the paper that correlates to the letter you pressed. The first commercially successful typewriter is from the year 1873. As you can see in the image below, it did not have the number ‘1’. Instead, they used the letter ‘i’, which is also (part of) the reason it is so close to the numbers eight and nine. It was to make typing the year 18xx and later 19xx easier. We still use this layout today, even though we do not benefit at all from the location of the ‘i’ key. The vertical stagger that I discussed before is also visible. This was done so that the little levers on the keys would not jam together when you pressed two keys that were near each other. We still basically use typewriters even though they are objectively bad to type on for a computer.
Touch typing Link to heading
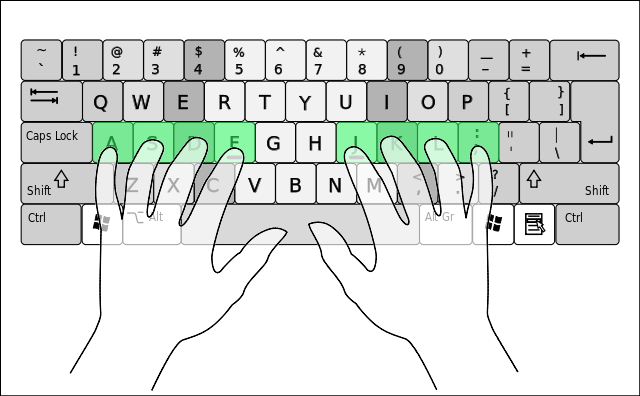
A quick side note on how you’re supposed to type on a keyboard. On each keyboard there are two little bumps on the (on a qwerty layout) ‘f’ and ‘j’ keys, this row is called the home row. Feel them on your keyboard now. This is so you can find these keys without looking with your index fingers. Then you should type by moving your fingers vertically to reach the top and bottom row. And by now you also see, or feel, the problem. The rows are staggered and reaching for the ‘y’ key with your right index finger is different from reaching the ‘r’ key with your left index finger. You might be used to it by now, but it is objectively a bad design.
Alternative staggers Link to heading
The stagger problem is easily solvable by just making a grid of keys instead of staggering the rows. Although even better is a ‘columnar stagger’, seen in the image below. The reason the columnar stagger is so comfortable is that most people’s fingers are not the same length. Your pinky finger is probably shorter than your middle finger, which is why if you want to reach the same key in the column, the column for the pinky finger should be a bit lower than the column for the middle finger.
Keyboard layouts Link to heading
As mentioned, the standard layout on most keyboards is qwerty. It is very old and might be designed to not have two keys close together typed right after each other, given the jamming issues mentioned earlier. But can we be more efficient? There are a few alternatives that I have personally considered.
- Dvorak
- Colemak
- Workman
All these alternative layouts make sure most of the typing is done on the home row, which means you move your fingers less. For example, Dvorak has the letters arranged in such a way that around 70% of the typing is done on the home row, as opposed to 32% on the qwerty layout.
I chose to go with Colemak DHM, a variant of Colemak that is very popular with split keyboards.
Ergonomic problems Link to heading
A standard keyboard is an ergonomic nightmare for many reasons, some of which I will review here. For example, there is the problem of ulnar deviation, which means that your wrists are bent outwards because the arms come at our keyboards at an angle.
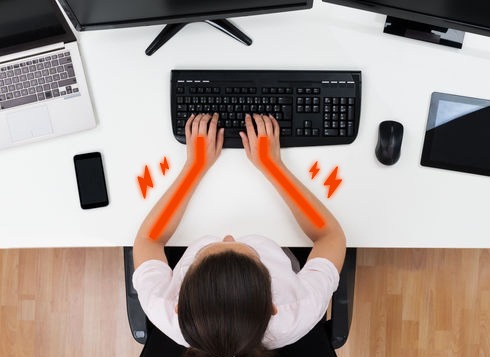
Most standard keyboards have those handy little feet at the back but using them is not great for blood circulation among other things.

One more issue that is not a natural stance for your arms and can therefore cause problems is forearm pronation. The natural position for your hands is with the thumb facing up. You can test this by just relaxing your arms and letting them hang by your side. Now when you turn your thumbs towards your body, your forearms are in pronation. Excessive exposure to this position can again lead to blood circulation issues and RSI.

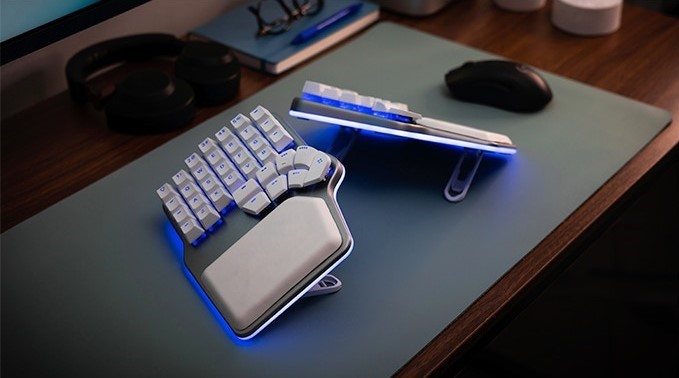
Split keyboards Link to heading
All these issues can be addressed by using a split keyboard that is ’tented’. This means they are slightly raised towards the thumbs, allowing for that comfortable, more neutral position. An example is the Dygma Defy, which is a big step up from a standard keyboard. It has the option for tenting the boards up to 60 degrees, comes with a great thumb cluster, and has a columnar staggered layout.
How many keys do you need? Link to heading
You already know the concept of keyboard layers because you use it every day when you press the shift key. The shift key transforms the way many keys work, for example when you press ‘shift + m’ you will get an ‘M’ character. And when you press ‘shift + 1’ you will most likely get an ‘!’. One more optimization we can make is using more layers. Now that we have thumb keys, we can remove the numbers from our keyboard and stick them under, for example, some letters while holding your right thumb key down. See for example this image where the middle button on the right thumb key is held down and the keys will transform like a shift layer.
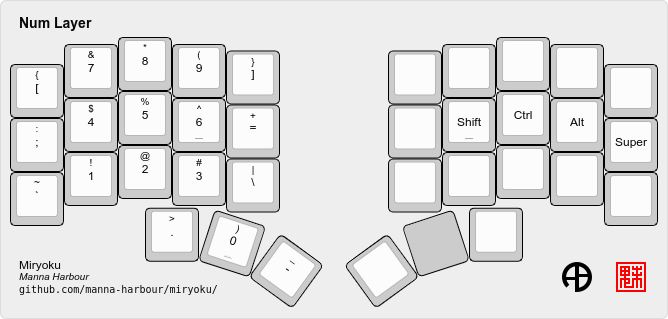
By using this concept more and more, we can narrow down our keys to, for example, 36, down from 104 keys on a standard keyboard. This means that your fingers have to travel less, and your keystrokes will be more accurate since you don’t have to move your fingers from the home row.
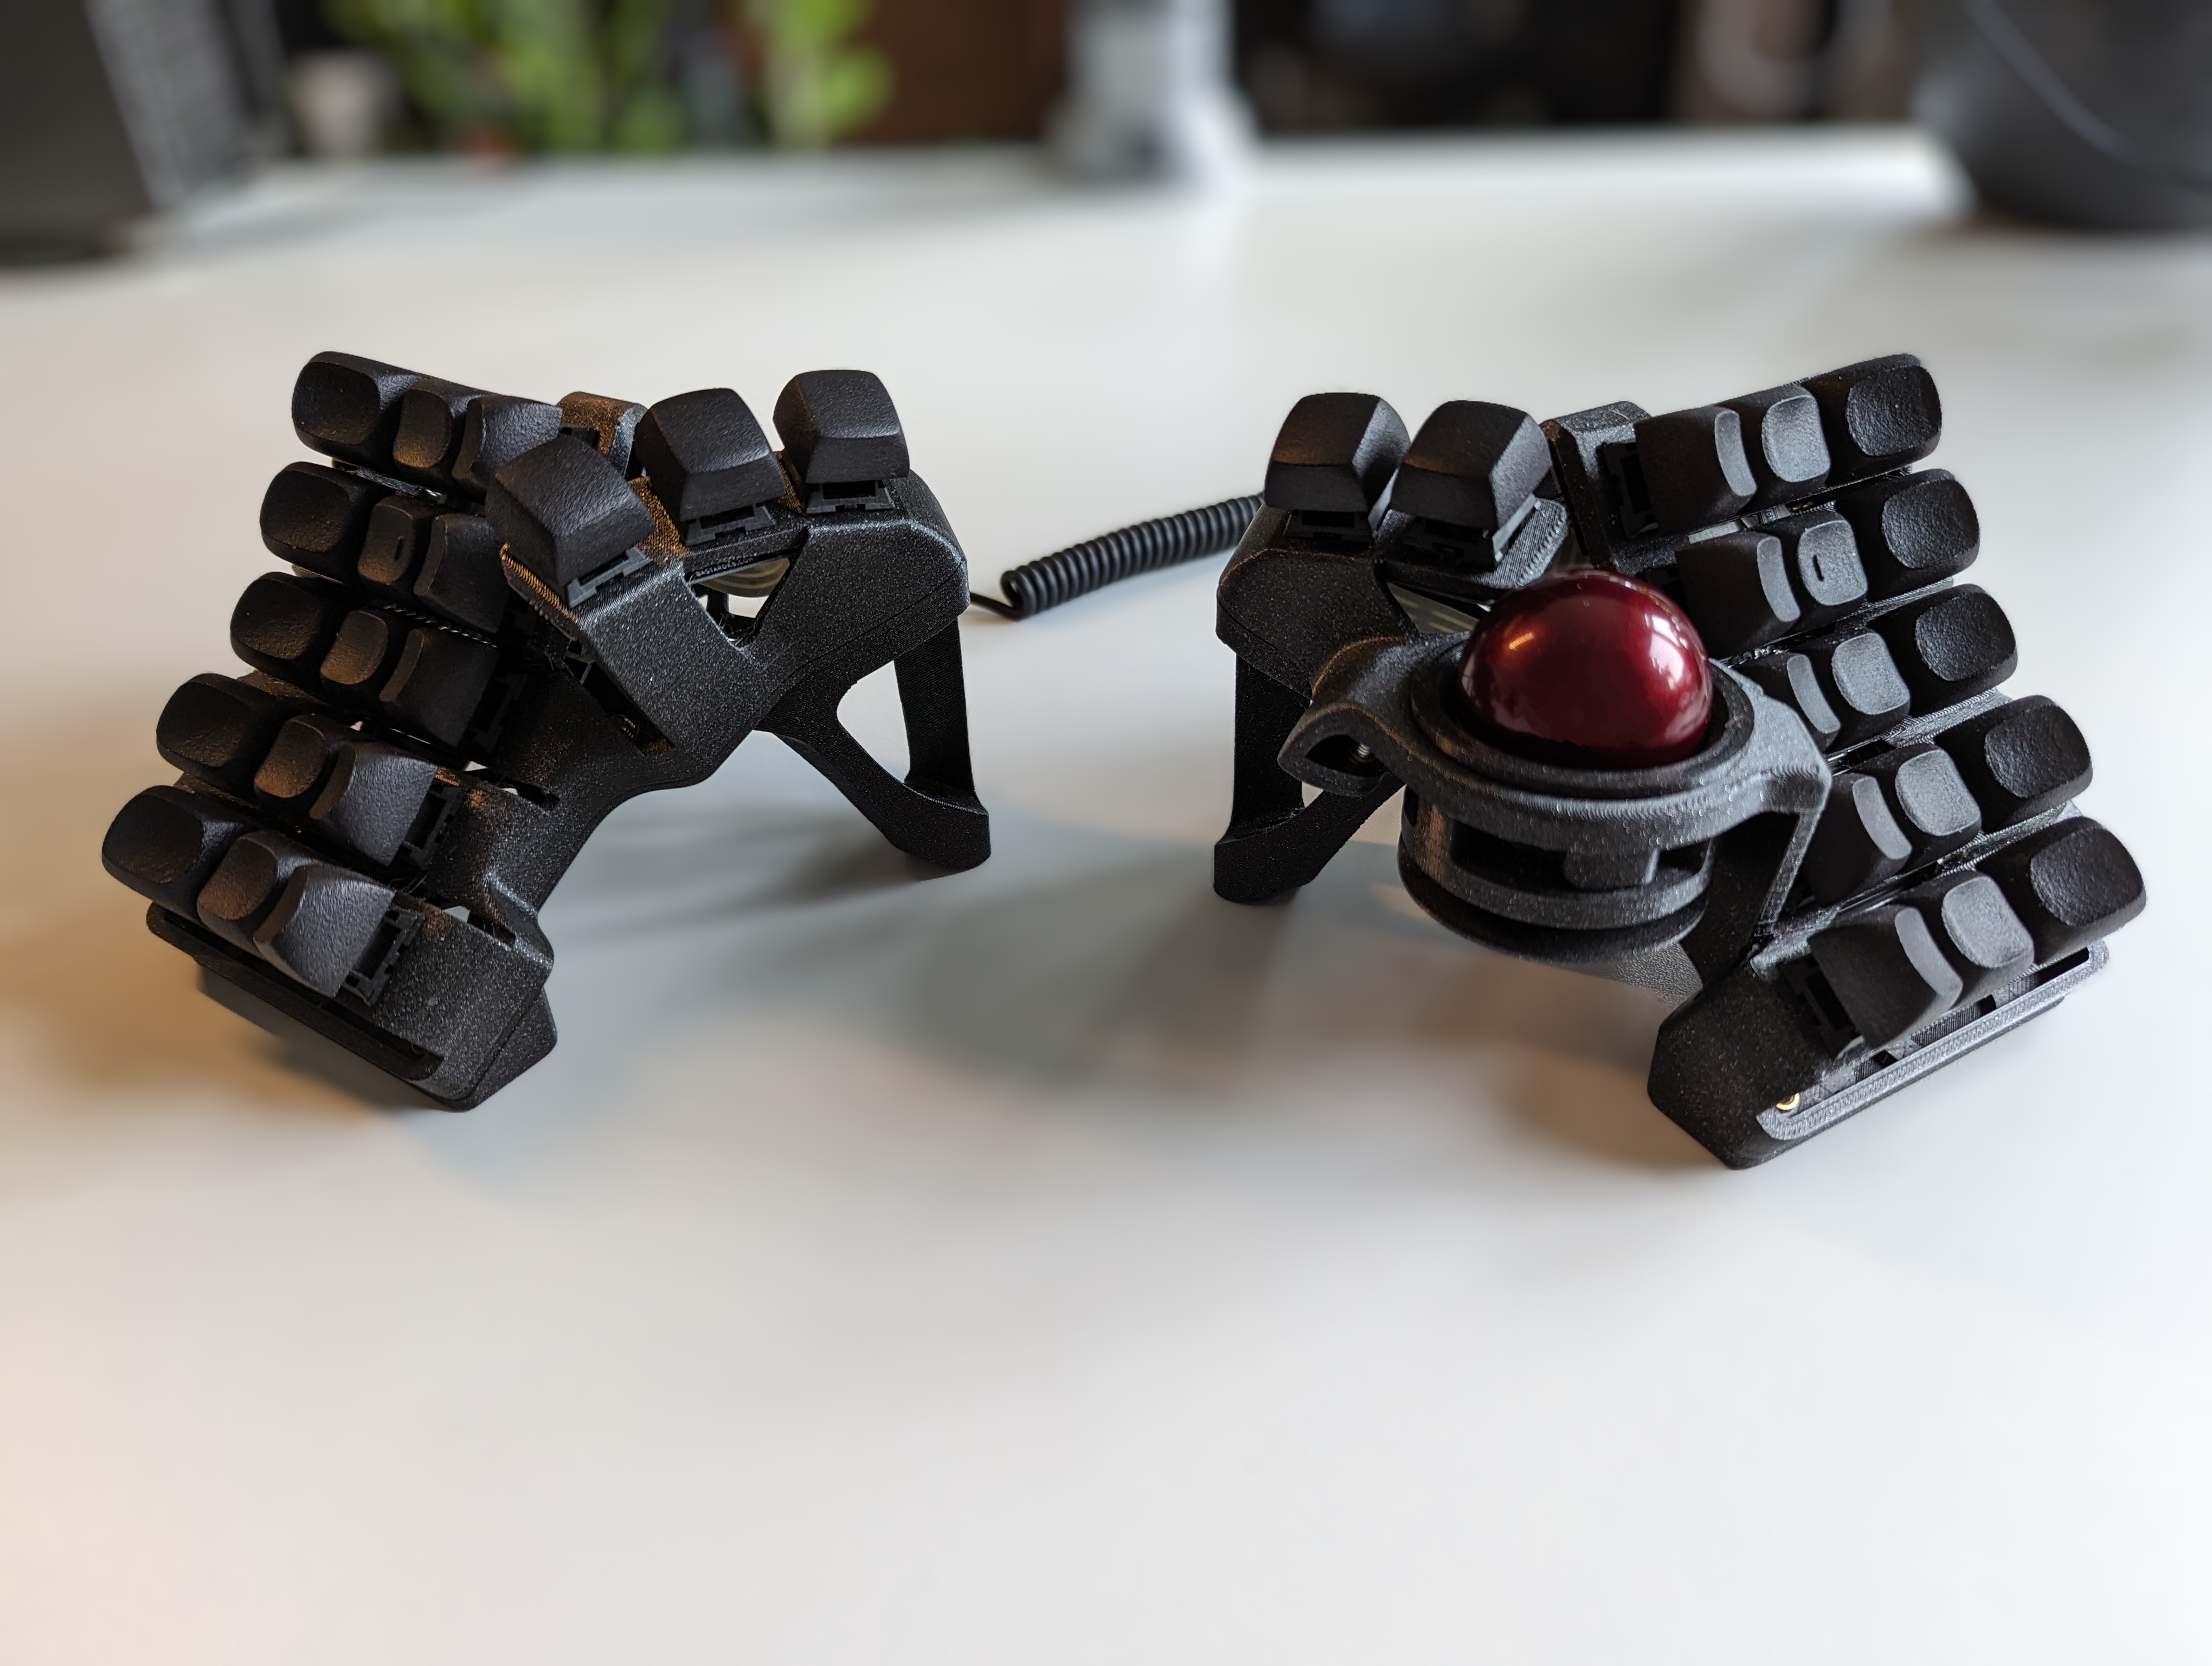
The perfect keyboard? Link to heading
The keyboard I’m using right now is the charybdis nano from bastard keyboards. It came as a kit, so I had to solder the parts together myself. Which I must admit, wasn’t easy. But the result is a 35-key split keyboard with built-in tenting and a trackball for a mouse. My hands never have to leave the keyboard again which feels amazing for productivity and ergonomics.
My advice and final thoughts Link to heading
Do I recommend everybody to spend 300 euros on a keyboard that they have to solder themselves (bastard keyboards also sells prebuilt kits) when their current solution works fine and adjusting to the new keyboard might take months? No, but now you know why your arms hurt so much when you type a lot. What I do recommend for anyone though is to look for ergonomic keyboards. Not all of them are as good or even good for you, but a good place to start is the sculpt keyboards from Microsoft. They are great value and already alleviate most of the symptoms you get from a normal keyboard. In terms of layout, I would not recommend changing your keyboard layout from qwerty to something else. When I made the switch to my first split keyboard (a Sofle V2), I decided I would also switch keyboard layouts at the same time. By only using Colemak DHM on split keyboards I can keep using qwerty whenever I need to. I was able to get used to a split keyboard fairly quickly. However, I don’t know if the efficiency gains of Colemak DHM match up to the months of learning to type on it. One more thing: once you are soldering those pesky little connectors and writing custom firmware for your keyboards, you can send me some hate mail for sending you down this dark, dark path.
If you would like to know more I also have a session about keyboards where I go more in-depth.